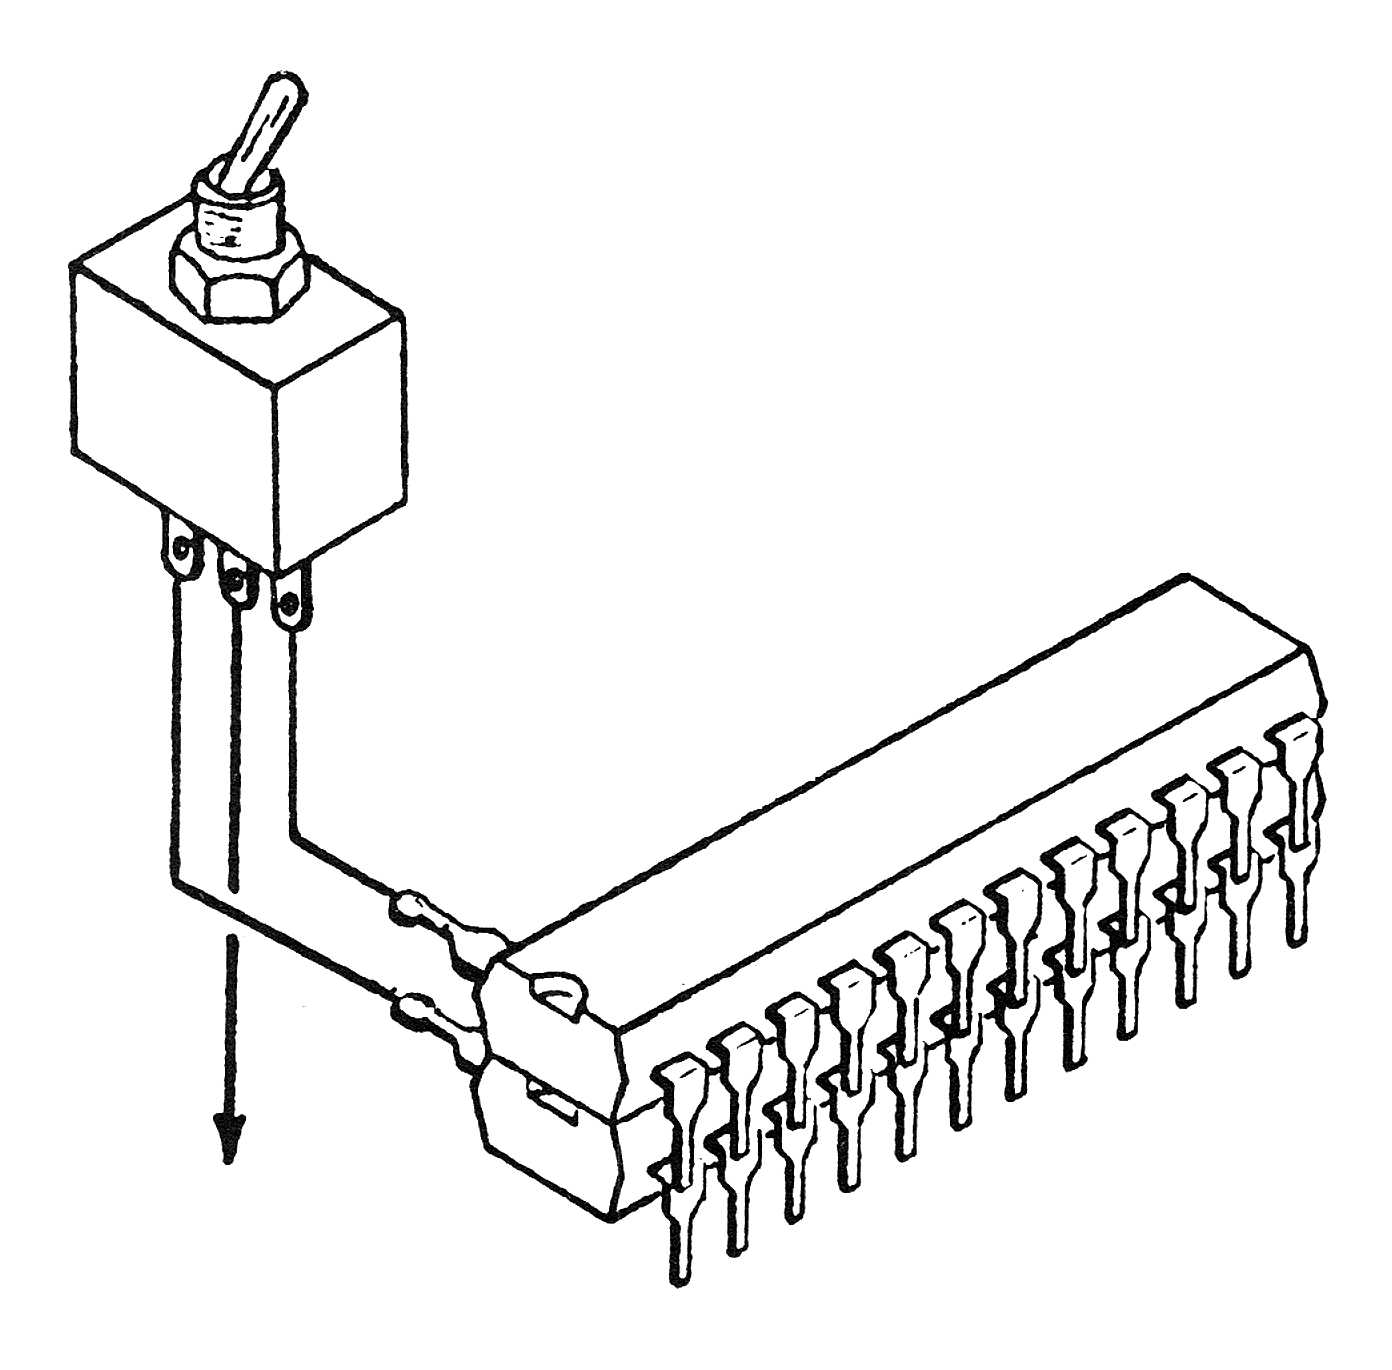
I received the 8K ROM upgrade for the ZX80 and was disappointed to find that I could not load programs in integer (4K) BASIC. I interchanged ROMs, and of course, I soon bent some terminals. Faced with the prospect of many hours of rewriting, I decided there had to be a better way. There is! In the Sept. 1981 Microcomputing is an article entitled “DOS Mod” by Scott King. Borrowing his idea, here is how to run integer and 8K BASIC in your ZX80 without unplugging ROMs.
First, be aware that static electricity can instantly destroy ROMs; observe these precautions while working with them. Both you and the surface you work on must be grounded. Attach a flexible copper wire to the central screw holding the face plate of a grounded wall receptacle. Strip 2″ of insulation off the free end. Keep this wire in contact with your body during the modification procedure. Loop the bare end around your wrist, or ankle or tuck it in your shoe, but remember to unwind when you leave the work bench! Next, spread a sheet of aluminum foil over the working surface.
You will need a grounded (3-wire) solder iron with a fine tip (less than 1/8″ diameter), needle nose pliers and fine wire cutter and stripper.
Use an ultra-miniature single-pole switch you can fit inside the ZX80 case when mounted on the lid. Radio Shack sells a suitable part. You will also need electronic-grade rosin-cored, fine-gauge solder and 9″ of 30 gauge insulated wire.
Remove the cover of the ZX80. Use a small screw driver to lift the ROM from its socket by prying up not more than 1/32″ at each end.
Each ROM is coded at one end with a recess, dimple or dot on the top surface. Arrange this feature to point away from you. Pin #24 is now furthest away and to the right of the key-feature. Gently bend this pin up using needle nose pliers. Do not lever against the ROM package, rather, squeeze the bend in the terminal to straighten it. Repeat for the second ROM.
Pin #24 is Vcc or the positive power supply for the ROM. Switching current to this terminal activates, and interrupting, disables the ROM.
You received your 8K ROM with terminals imbedded in conductive black foam. If you still have it, use it for the next steps.
Insert one ROM into this foam pad up to the shoulders of the terminal. Place the second ROM piggy-back as shown in the drawing. Align the pins carefully and make sure the lower ROM pins spread outward to contact the socket. Tack the ROMs together except at the two pins #24. Use an absolute minimum of solder. Do not allow solder to run below the shoulder of the lower ROM pins or you can’t re-insert the assembly in its socket. The foam helps control the solder. If you are unsure about this step, try it on old ICs.
Inspect for shorts and remove excess flux with a Q-Tip dipped in alcohol. Vodka will do. With the key-pad closest to you, the dimple on the ROM packs should point away leaving the two pins #24 to your right. Re-insert the dual ROM assembly in its socket.
Check your connecting switch for size. There should be room to mount it inside the ZX80 case just “north” and slightly “east” of the ROM assembly. Make sure that with the switch mounted and lid closed nothing touches the PC board! I needed to trim about 1/16″ off my switch terminals.
Mark the switch position on the lid and drill a mounting hole. in the latter. I sawed about 1/4″ off the toggle to reduce its protrusion from the case surface. Mount the switch; this locates it with the lid laid beside the ZX80, about 3″ from the ROM assembly.
Cut three 3″ lengths of 30 gauge wire. Strip and tin 1/16″ of each end.
Leading into the ROM socket at pin #24 find a wide printed circuit conductor run. Quickly solder one wire to this run on the PC board. Don’t overheat the PC board. The other end of this wire goes to the common, usually central, post on the switch. Connect the other two wires between each switch pole and the two pins #24 sticking out from the ROM assembly.
Carefully replace the ZX80 lid taking care not to pinch or break a wire. Power-up your system and see which switch positions correspond to integer and 8K ROMs. I suggest you disconnect your power supply before switching between ROMs. You can not, of course, load a program into RAM and then switch ROMs.