
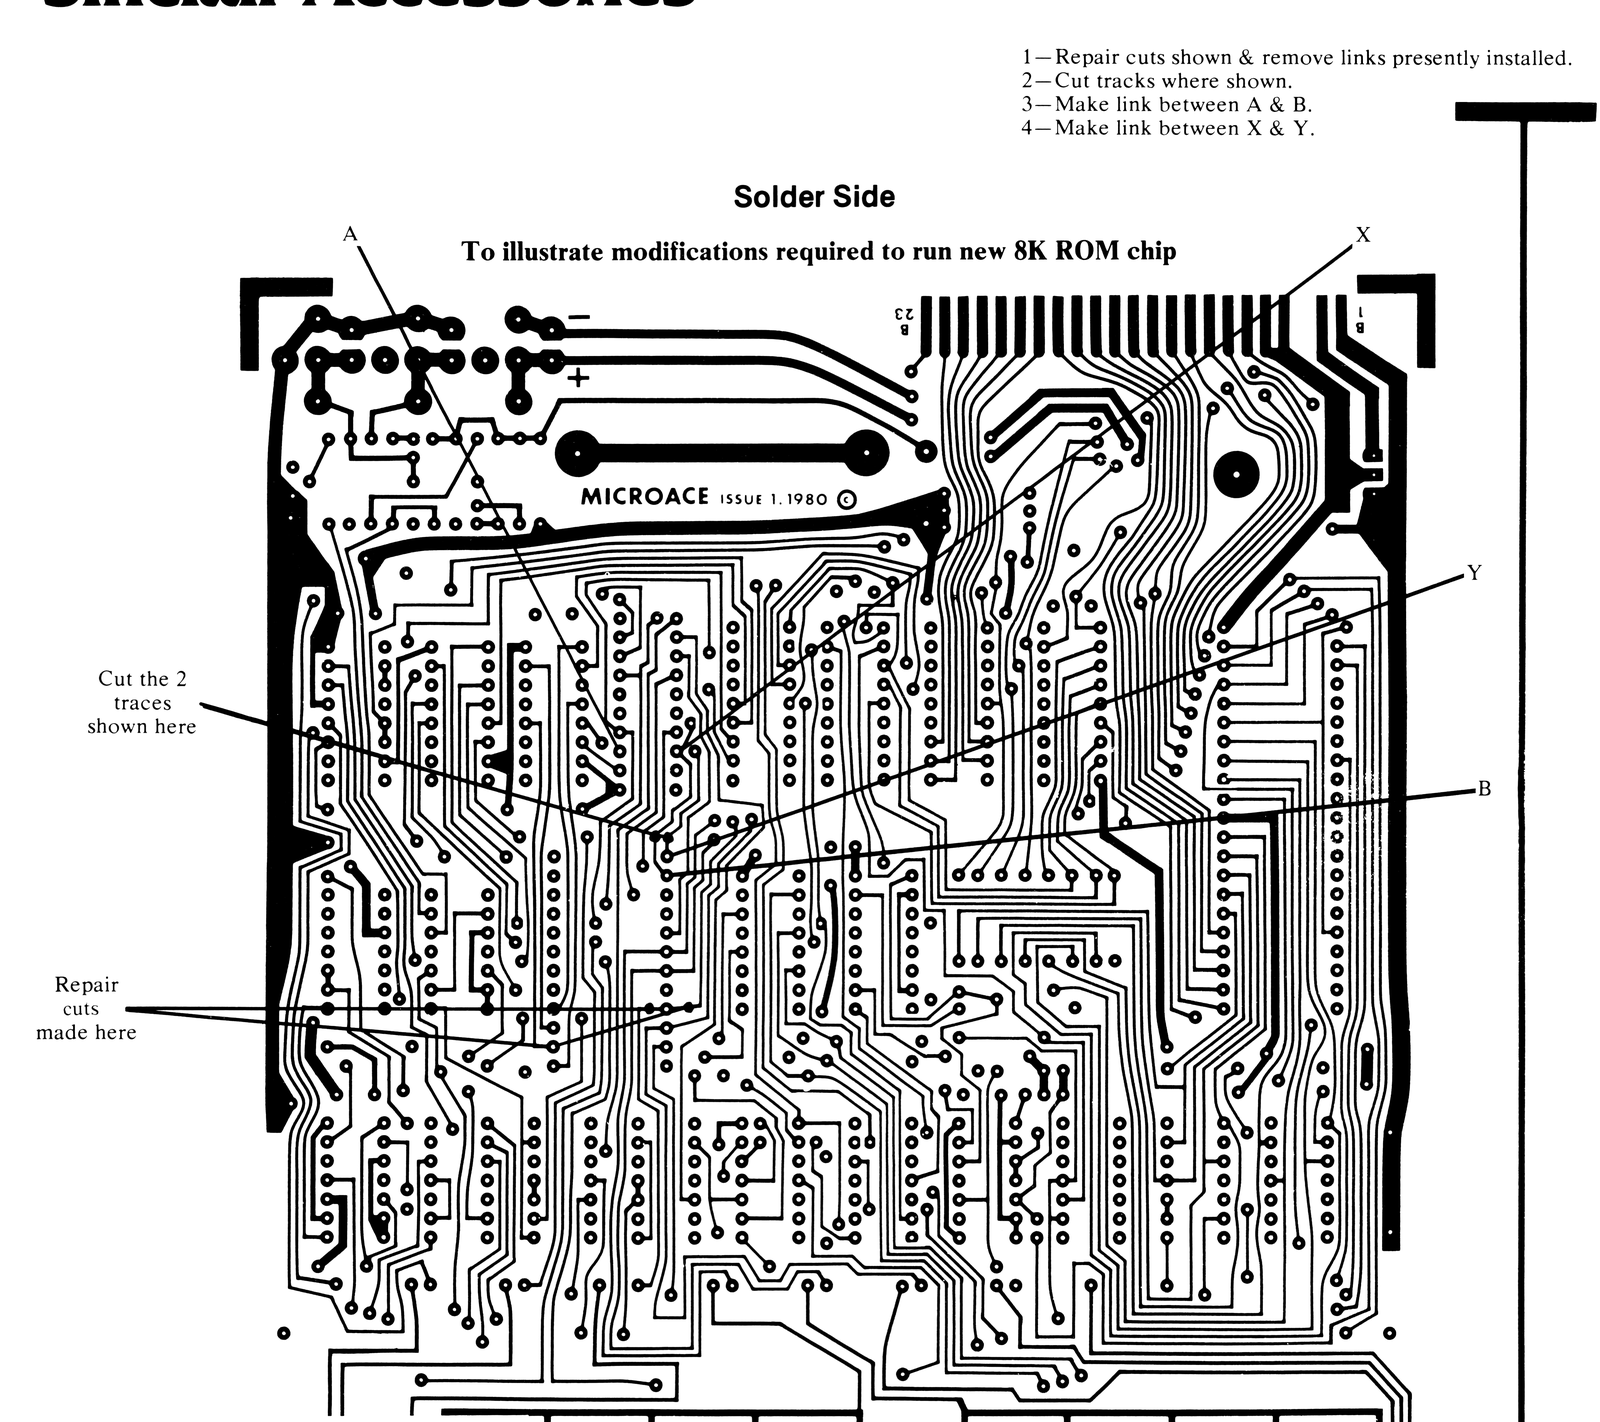
- 1—Repair cuts shown & remove links presently installed.
- 2—Cut tracks where shown.
- 3—Make link between A & B.
- 4—Make link between X & Y.
The 16K RAM Module:
The 16K RAM Module is completely compatible with the MicroAce 1K Kit; the unit can be simply plugged on the back. If the RAM Module is to be fitted to a 2K Kit then the extra 1K should be removed along with U17. Please be sure that the 2K2 resistor has been installed in place of R16. The Module may now be plugged onto the back of the machine.
The 8K Basic ROM:
The MicroAce kit comes with two track cuts on board, i.e. both sides of pin 21 of the ROM chip. You also need to make two links on the board.
Before installing the new ROM chip, remove both links and repair the cuts that we have made using a small piece of wire. (see above).
The next stage is to cut the track that goes to pin 13 of the ROM chip and the track that goes to pin 14 of the ROM chip as shown above
Now use a small piece of wire to make a link between pin 13 of the ROM chip (on the PCB) and pin 18 of U6.
Also make a link using another piece of wire between pin 14 of the ROM chip (on the PCB) and pin 3 of U6.
The new ROM chip may now be plugged into its socket and power applied to the board.